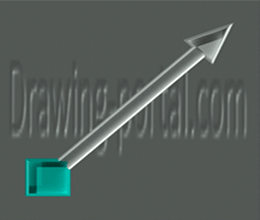
Rays in AutoCAD
| AutoCAD drawing command | |
| Ray | |
 |
|
| Definition | |
| Ray - straight line (linear object), having beginning (limited on one side), but not having an end. | |
| Tool | |
| Ray tool is cyclic command that allows you to build auxiliary lines (rays) starting at common point and endless in one direction. | |
| Command | |
| Ray | |
| Object | |
| Ray |
Principle of creating ray is very similar to construction of object "Direct". Object AutoCAD "Ray" is also an auxiliary line and is mainly used to construct or objects, and ir markup.
Building rays
Ray team is responsible for its creation, which can be called in following ways:
- You can build rays from menu bar; Drawing item is Ray AutoCAD string;
- You can create it from tool ribbon on Home tab — in Drawing group of tools — Ray button;
- You can draw rays in AutoCAD from classic Drawing toolbar - Ray button (not available by default);
- You can draw it by directly typing command name on Ray command line.
Write name of this Ray command in command line. Press "Enter". system will issue following request:
You can set starting point of rays in AutoCAD by clicking mouse or setting coordinates. As soon as you set its starting point, program will display its preliminary view, starting at starting point and going off to infinity in direction of crosshair cursor, and following prompt will appear in command line:
those. now it is necessary to indicate in which direction ray should be constructed in programm. We indicate second point by clicking mouse. Ray command is cyclic command, so after setting second point it will not complete its execution and will require specification of next point through which second ray will pass. All rays will come from same reference point as first ray in AutoCAD. To end loop command, press "Enter" or abort execution of Ray command by pressing "Esc" key.
Are no additional options that extend functionality of Ray tool.
How to make ray in AutoCAD at an angle to horizontal
1) How to build rays at an angle to horizontal 1 method
Creating ray in AutoCAD at an angle of 45 degrees to horizontal (relative polar coordinates method).
Call tool Ray. Specify starting (reference) point by clicking mouse. Now we indicate its second point by entering into command line: @5<45.
ray at an angle of 45 degrees to horizontal (positive direction of X-axis) was built.
After @ sign, you can use any number, it does not matter, because rays of AutoCAD are infinite in one direction.
2) How to draw ray at an angle to horizontal 2 method
Build ray in AutoCAD at an angle using dynamic input display.
Call Ray tool. Specify starting (reference) point by clicking mouse. Press "Tab" key, reby switching to additional dynamic input field "Angle". Enter angle of 45 degrees. Press "Enter".
beam at an angle of 45 degrees to horizontal is built.
Useful lessons and related topics
I recommend to get acquainted with similar lessons of AutoCAD:
- auxiliary endless straight line;
- key points;
- broken line of segments;
- smooth curve spline;
- universal line polyline.
Read and see also:
- scales (print, viewports, lines)
- Sheets - Set, Sheet Settings Manager.
Courses, tutorials AutoCAD:
- 2D design.
- 3D modeling.
- descriptive geometry.
- Engineering graphics.
- House plan.
- Assembly drawing of spur gear.
- 3D kitchen model.
Video "How to build ray in AutoCAD (auxiliary/marking lines: straight, segments)"


Subscribe
My comments